Showing posts with label patterns. Show all posts

Friday, July 24, 2015

Moving right along

Lots of stuff going on around here (por fin)! The new house is officially ours, and we're busy, busy, busy getting things painted, moved and organized. The first room on the painting docket is my new.....SEWING ROOM! The downstairs bedroom is going to belong to me for a while, until the boys are much older, and it's probably going to be the only way I manage to preserve my sanity for the next several years. It's been super fun planning out decor, furniture arrangement, and so forth, and I'm so excited to have space for all of my machines, my fabric stash, ironing board, and everything all in one room. No more sewing on the dining room table for me! I've yet to find a desk for in there, to double as a sewing table and a storage space for home-office related stuff, but I'll make do in the meantime. 

We've been busy painting this week so we can get things moved in, and my sewing room was up first on the list (partly because a lot of the big stuff we need to move will be going in there, and also because it's clearly the most important room in the house). The color looks a little pinkish in photos, but it's actually a really lovely, pale lilac. 


Our bedroom is next, and I'm about half finished with the first coat, but OH LORD is it difficult to paint when you're also wrangling an infant. Having to stop every 15 minutes to change diapers or nurse makes it unbelievably inefficient and it's taking like twice as long as it should. He is pretty cute, though.

Taking a break for a sling nap and some lunch, since he was getting really cranky about sitting in his little bouncy seat.
Our room is going to be a bright, minty aqua color, and the boys' room is going to be a bright blue (so that dark grey will be gone). This is taking a frustratingly long time with little R.H. in tow, but I'm really hoping that with a little extra assistance from the mister on Sunday (maybe) I'll be able to get all the painting in the new house finished by the end of the weekend. We'll see.


While we were still waiting around to be able to close and get started moving I found some more time to work on getting projects cut out, so once we're settled in I can get right back to sewing. Three of them are part of my Vintage Sewing Pattern Pledge, and the fourth is another Hawthorn blouse/stash busting project. New York 1292 and Anne Adams 4811 are a couple of warm weather patterns I hope to get finished before the end of the summer if I can. 


McCall 3610 is a long-sleeved, late 1930s pattern I chose to help flesh out my cooler weather dress options. It's not nursing friendly, so probably won't get much wear this winter, but I think it will become a staple next year. The skirt should even be pretty cycling-friendly. I'm making the bishop-sleeved version, but without the detachable, contrast collar. 


Since I finished my first two Hawthorns I've been wanting to make more. I had this blue and yellow floral cotton in my scrap bin, left from a dress I made a few years ago and ended up giving away. There was just enough left to cut out a sleeveless version of the blouse. I've also got some upholstery weight yellow gingham in my scrap bin that I'm going to use to make a coordinating belt, and I'm thinking about trimming the blouse with blue piping (the collar at least). 


I really can't wait until we're settled in and I can sew again (even if it's just a little bit every now and then).

Wednesday, June 24, 2015

"Turtle" to some..."Rough" to others... - Project Progress

Well, since we're STILL waiting on the stupid mortgage lenders to give us an actual closing date, practically everything I own is still packed up in boxes, so despite the incredible urge to sew that I've been having lately I haven't been able to. I've moved on to yet another one of my knitting WIPs, so I'll at least have some new stuff to wear this fall/winter even if I can't get any more of my Vintage Pattern Pledge summer projects (or any modern patterns for that matter) finished for the warmer weather. 

This project is sort of part of my own personal Vintage Pattern Pledge, although it's knitting and not sewing, so I'm at least in keeping with the spirit of my original summer plans. It's a pullover pattern from a knitting magazine that a friend gave me a couple of years ago. The magazine is from 1940, and there are a few really nice sweater patterns in it, as well as patterns for four different skirts, intended to be combined with any of the sweaters to make either a two-piece outfit or a dress. I'd really like to make a couple of the skirts as well, since I've always admired the vintage, knitted suits and dresses that are so popular but so difficult to find.

Anyway, I bought this yarn (Cascade 220 in Irelande) ages ago, with the intention of making a cabled sweater of some sort, but then decided I wanted to do something different. Initially, I thought I'd use it for a pattern in North, but the neckline would prohibit wearing a camisole or anything under it, and the yarn isn't quite soft enough to wear against my skin. So, after much pondering and sifting through all of my knitting patterns and the Ravelry library, I decided on this pullover pattern. It'll be great for winter bundling, because I'll be able to wear a long sleeved shirt or long underwear under it, which will be nice. 

vintage knitting magazine 1940s
I really like the cabled sweater on the front, too. 

1940 turtleneck pullover sweater

1940 raglan sleeve sweater
My project bag was made by Rochelle. The colors are so cheery, it makes knitting even more fun to carry my projects around in this. (Way better than the medical supply company tote I used to drag them around in.)
It's a raglan sweater, as you can see, knitted top-down in the round, so I don't have to mess with all that tedious seaming once I've got the pieces finished. I'm seriously loving that aspect of this pattern, especially after seaming together all those pieces for my mohair cardigan a few weeks ago.  I've got a fair amount of this finished already, as the straight stockinette goes extremely quickly. I did go back and knit the collar before finishing the rest of the sweater just so I could really see how it was going to work. I just didn't have the patience to wait. I've got about 8 inches to go before starting the waist ribbing I think.  I think I've gotten more knitting done in the past 6 months than I've gotten done in the last couple of years (partially because my machines are packed up), but I'm really looking forward to having some new knitwear this winter. Once I've got this finished, I have a 1940s fair isle vest from A Stitch in Time V.2 up next in my queue, along with another pair of socks, this time with a little color work. 

Finally, although we are still waiting around on house stuff, our second little boy made his debut in this world just about two weeks ago. He's a sweetheart, and we're all pretty fond of him (even the two year old, although he's having a hard time adjusting to sharing the attention). 


Friday, January 23, 2015

Cozy, cold weather knits

I've got another knitting project to share with you all today! I haven't been doing any sewing lately since it's super hard to keep the space I need clear of toys, and even harder to keep the kid from trying to run my machine while I'm not looking, so I've consoled my idle fingers with lots and lots of knitting (a decision for which I am now paying dearly; oh the knitting pains).

This project was a first for me. I've got so many different projects in my queue that sometimes it's hard to decide what I want to make next, but after seeing Michelle's GORGEOUS new socks I knew exactly what I wanted to pick up after I finished assembling that giant sweater. I've never made socks before (well besides the tiny pair of baby socks I made for the boy last year) so this was a fun new experience for me. I think it's safe to say I'm hooked. I will always be a sweater knitter at heart, but I see numerous pairs of socks in my future.

They are the Little Cable Knee Highs from The Purl Bee. I wear knee socks all of the time in the winter, over tights, under jeans, around the house. That is one habit from my Catholic high school days that I don't think I'll ever lose. When I saw Michelle's version in that gorgeous pale blue, such a simple sock design with that little bit of interest at the back of the leg (I'm a sucker for a cable) I knew I was going to need multiple pairs of these. Until now I've only had one pair of hand knit socks, a bright green pair that my mom made for me a few years ago, but they are the warmest most comfortable socks I own and I'm glad to finally have another pair. I promise they're actually the same length, but my leggings kept sliding and my slight contrapposto stance makes them look a tad off at the top as well.

alpaca cabled knee socks

After making the first sock I realized that the fit on the foot wasn't quite how I wanted, and the right sock is just a hair long, so the heel flap pulls up a bit on the back of my heel. I knitted the second sock a few rows shorter in the foot and it fixed that problem. You can see the slight difference in the height of the heel flap in the photo below.

Cabled alpaca knee socks

We just had a new local yarn shop open up in early December after a several year long fiber drought. The only other "local" option was a shop WAY the heck out (we're talking a minimum 30 minute drive and for someone who normally walks or bikes places that might as well be in another state). It's "technically" still in the metro area, but like I said, it's not really "in" the city proper. The only other yarn shop we had closed years ago and so there really haven't been any options besides JoAnn and those sorts of places (which never carry the sort of stuff I want), so I've generally ordered yarn online. I was so stoked about A Yarn Crossing opening I went on opening day specifically in search of yarn for this project. Incidentally, it's only about two blocks down from husband's restaurant/bar as well, making it a mere 3 miles from my house and FAR more convenient than driving way out in the east end. What's really great about it, in addition to being in an adorable little converted shotgun house painted lovely bright colors, is that they carry a fair amount of local fibers, too! They have yarn and roving from local farms/spinners/dyers, expanding their inventory while supporting more local businesses/artists and providing customers with really unique products. If I didn't have a toddler with me all of the time I'd seriously spend hours and hours and hours hanging out in their sitting area knitting and sipping tea. 

Anyhoo, the yarn I bought is an alpaca blend sock yarn that is really comfy and was pretty easy to work with. I wanted something in a neutral color to wear over my maternity leggings and with my skirts to keep myself warm this winter since most of my standard layering pieces won't accommodate the baby belly. 


These are actually not quite as long as the original pattern, although that was not intentional. I was reading the pattern on an iPad screen because my printer is currently down for the count, and since I can't really absorb things I've read on a screen instead of on paper I realized (after the fact of course) that I had accidentally skipped a total of 8 cable repeats between the increase rounds through the calf. They are still a totally functional height, but I'll definitely make sure to include that extra 3 inches or so of sock the next time around.

The cuff fold over should really be wider, but because I lost length in the calf I lost a little width in the cuff fold over. 


Shortening the foot on the second sock helped a lot, but I still wasn't getting quite as snug a fit on my narrow foot as I would like, so for the next pair (for which I have some butter soft, brown merino) I started the foot on size 1 needles and am switching to 2s for the calves. So far the fit is pretty spot on with those. I've had to put working on the second pair on hold for a while because I was knitting so obsessively on these I gave myself tendonitis in my right arm. It's much better, but I'm going to take it easy for a few more days before I attempt to pick them back up.

I did take a rather foolish few hours the other day to whip up some quick, scrap yarn mittens for the boy since he lost one of his, but I immediately regretted it and had to slap on a serious wrist brace afterwards. I've been trying very hard to be good since then.

fair isle toddler mitts
The yarn for these was left from the sweaters that I made him last year.
While I was very impatiently awaiting the opening of the yarn shop so I could get yarn for my socks, I went ahead and cast on for a sweater for myself as well. It's the pattern on the left, "Roll Neck", from a 1940 knitting magazine that a friend gave me a year or two ago. There are a few really cute sweaters in it, plus some seriously great knitted skirts that I'd love to make some day. But, back to the topic at hand. I figured I could start this now and maybe have it finished for next winter when I'd be able to wear it, but if not it would definitely be a good thing to finish for the following winter when I won't be nursing anymore. It's knitted top-down, and I'm maybe half way down the shoulders I think. I'll get back to that once I get my brown socks finished.

1940 knitting pattern

I'm hoping to be back to knitting by the end of the week, and should have some new socks before the month is over as long as I don't hurt myself again. It's been so hard not to be working on something.

Have a good weekend!

Friday, January 16, 2015

2015 Vintage Pattern Pledge

I hardly ever get a chance to participate in all of the great sew-alongs and things that people are always hosting, but this is one that I'm definitely jumping on board with this time. Marie over at A Stitching Odyssey is hosting another Vintage Sewing Pattern pledge this year and I'm planning on taking part. The great thing about this pledge is that it's fairly easy to tailor the challenge to your individual abilities and ideas. Marie has outlined a number of possible ways to organize your sewing plans, and I am opting to choose a few of my original vintage patterns to make over the course of the next year.


I, Evie, pledge to sew up at least four of my original vintage patterns this year. This will include patterns from the late 1930s through the early 60s. If I'm able to, I'd like to extend that number to include more projects, but 2015 is shaping up to be a very busy year, so I think that four is a reasonable number for me to shoot for.  The specific patterns that I am planning on using are the following:

Simplicity 3345


The pattern is from 1960, and as you can see it's a maternity pattern. I've got baby #2 due in mid-June, which is partly why my projects/posts have been somewhat few and far between the last few months. I made this pattern up last time around in the fabric you see here. The print I have intended for version 2 is a fairly busy, retro novelty print. I'll get pictures of that for you when I get around to cutting the dress out. I'm considering making the collarless version this time. 

Simplicity 2475 or Simplicity 1174


2575 is the one I'm really leaning towards (the sleeveless top) but I'll need to see just how wide the neck actually sits on me, since I do need to be able to wear a regular bra and camisole with it. The fabric I'm planning on using is a fairly sheer floral lawn, so I won't be able to avoid the strap issue with whatever I have to wear under it. 
If I can't make the neckline work then I'll be making 1174 again, but in the sleeveless view this time around. I LOVE that top and I'd be totally happy with having another one if I can't make the first pattern work. 


Anne Adams 4811


This is another one that many of you may recognize. I have another couple of challis prints that I bought on sale and I've been itching to make another of these. It was such a great dress to have this past summer, it's nursing and cycling friendly, and it's super comfy to boot. 

For the fourth pattern I'm considering McCall 3610


This is a very late 30s pattern I've had in my stash for some time and have yet to make up. I may have to put this one on hold in favor of something that buttons down the front so I can nurse in it, but we'll see.

I've been toying with the idea of trying to whip up a pair of shorts from this 1950s maternity pattern:

Advance 8512


Since I'll be pregnant further into the hot weather this year it might be nice to have a pair of shorts to wear, plus I'd kind of just like to see how these go together construction-wise, and how they fit on the body. I think I've got a couple of things in my stash/scrap bin that might work for a wearable muslin at least. They'd be nice to have for chasing a 2 year old in as opposed to the pencil skirts I wore most of the spring last time around.

I plan on getting started on the first of the maternity patterns in the next month, so hopefully I won't have any problem getting at least two of them sewn up before April so I can get a couple of months of wear out of them at least. I'll have to take a little bit of time off over the summer while we're acclimating to the new schedule/living arrangement, but I hope to get back to sewing quickly enough to finish at least two more projects before the end of the year. I'm really looking forward to seeing what all of the other participants come up with this year!

Monday, June 16, 2014

Playsuit Sew-Along Part 2

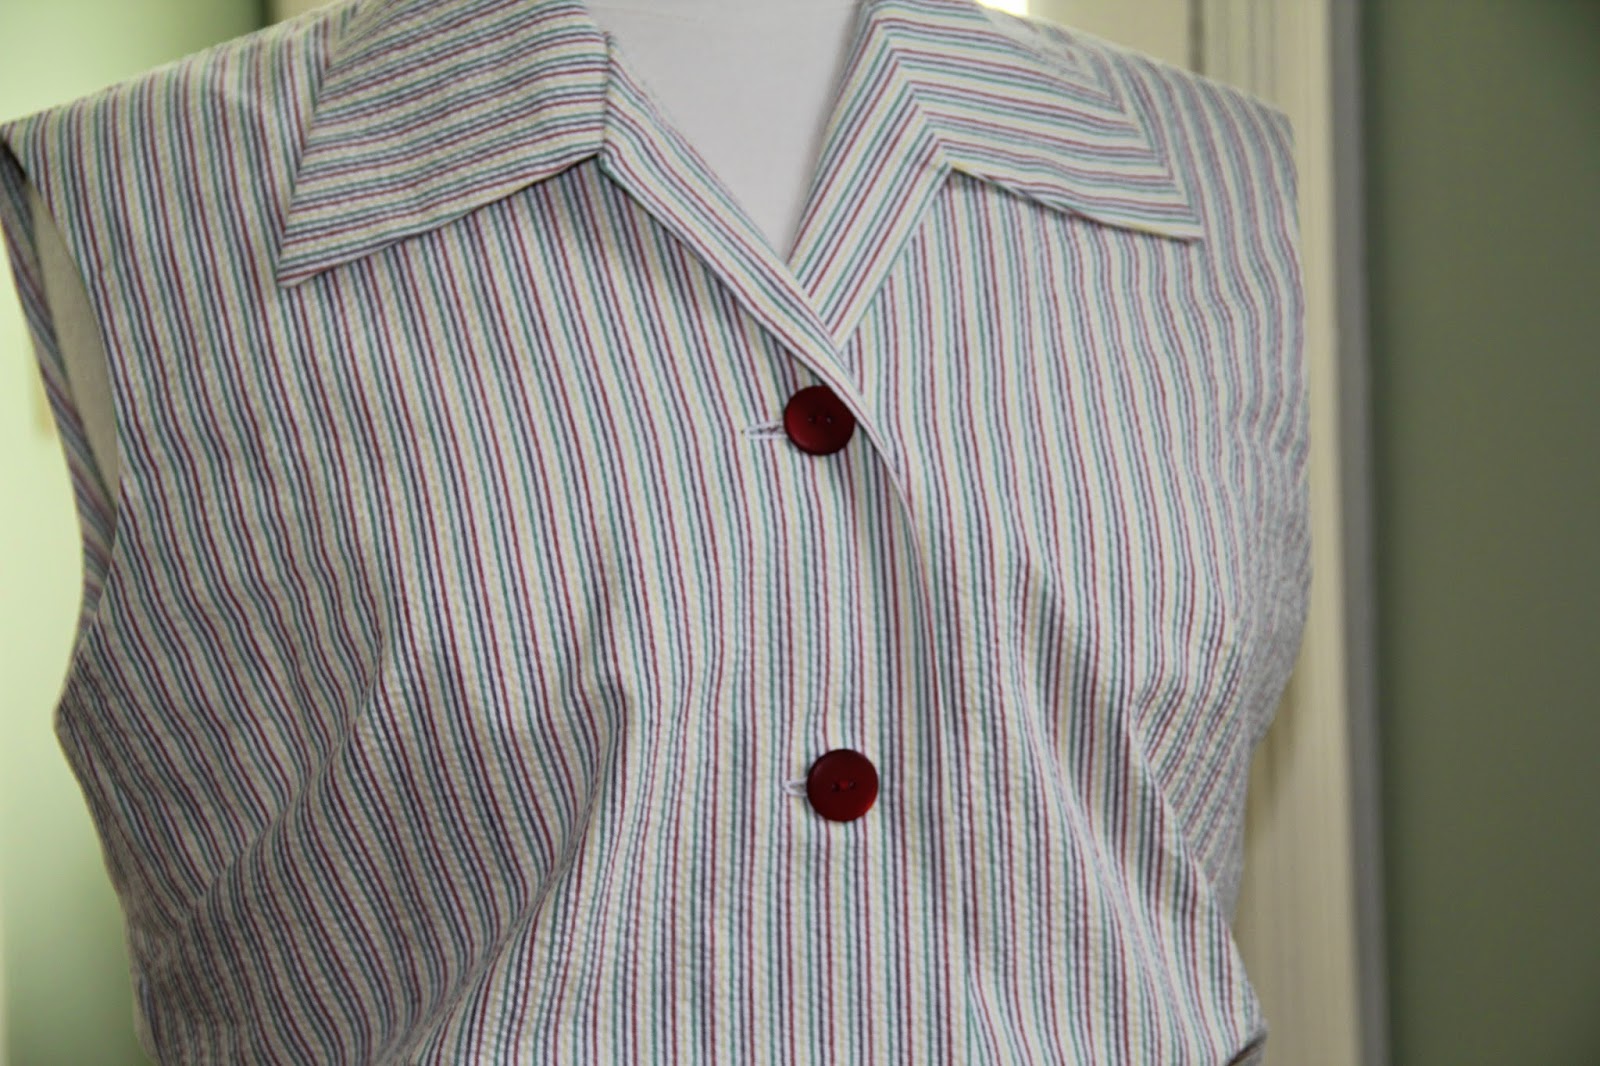
I've now finished the next two pieces of the planned four for my playsuit. The shorts and blouse were from two more patterns in my vintage pattern stash. The shorts pattern is from the playsuit pattern that I mentioned before, Advance 2407, which I still need to get a better picture of. I can't find one anywhere on the internet for it, so you'll just have to be patient. I made the shorts as a separate piece, eliminating the blouse portion of the playsuit and opting for a simpler, later style of blouse from the other pattern, New York 1292. I don't really have much to say about these two pieces, as they are fairly simple and went together quickly and easily, so without further ado, here are the photos of the finished shorts, blouse and halter from the previous post all together. 

1940s seersucker stripe playsuit playsuit sew-along


And here is the halter top with the shorts...


The fourth and final piece I'll be making is a coordinating skirt in a solid; something that will be very easy to incorporate into my existing wardrobe. The fabric I'm using is a purplish-navy linen/rayon blend that matches very nicely with the blue stripe in the seersucker. I'll be using New York 1292 for the skirt as well, but I'm not going to add the triangular appliquéd pieces on the sides as I do want to maintain a simpler, cleaner line. Originally I was thinking of using a 1970s skirt pattern that I have. It's very similar in style, A-line and with buttons down the front, but it's a slimmer skirt, and I think that this slightly fuller A-line will work better with the other playsuit pieces. 


And just for good measure, here's my little helper. He just turned one a few weeks ago. I can't believe how big he's getting! (He hates when I try and wipe his face, which is why it's covered in blueberry oatmeal). 


Have a great week!

Thursday, October 3, 2013

Project Progress

I've made it beyond planning on this one already! The last two days I have been working on cutting out the pieces for my pencil skirt and vest ensemble. The patterns I decided to use were two in my stash from the 1950s and 1960s. The vest pattern I'm using is one I have used in the past (Butterick 9474 View B), but this time I'll be making View A. The skirt pattern (which I have altered slightly and will explain further in a moment) is from Butterick 6052. (Both images courtesy of Vintage Patterns Wiki)


Of all the 1950s skirt patterns I have in my possession, I finally decided on this one because it was the simplest and therefore would be the easiest to use as a base for alterations. It has no front darts, only one back dart on each side, and no vent or pleat. One of my favorite things about working with vintage patterns is seeing the alterations that the former owners made, giving me a little insight into their lives in a way. This lady (who labeled all her pieces with her name: M. Anderson), was taller than most of the previous owners of my patterns. She didn't have to adjust the skirt length at all (or at least didn't do so before cutting). She did, however, have a little bit of a belly apparently :) She had slashed and spread to give herself a bit more room in the front. It's so fascinating what you can learn about people by looking at their old patterns. 

When using '50s skirt patterns I generally shorten them by a few inches (since I'm slightly shorter than average and also like a bit higher hem than was fashionable in the '50s). For this skirt, though, I chose to leave it a bit longer. The existing skirt length (after hemming) was about 30 inches, and I'm just too short for that length of skirt. I did want to maintain a little more traditional length with this one, nonetheless, so I only shortened it by two inches. I also pegged the skirt slightly, since I like a bit closer fit (more akin to a tight fitting "wiggle" dress). The pleated inset in back will give me enough extra room to move freely even with the pegged hem.

The fabric I'll be using as my vest lining is left from a dress I made a couple of years ago and passed along to a friend since it fit her better. I really didn't want to have to buy anything to line this with, so I went digging through my scrap bin and discovered I had more than enough of this print left to cut the vest lining. It works beautifully with the medium grey of the suiting, and it has plenty of personality to jazz up the garment a bit as well. I'm a big fan of a statement lining, and this one definitely makes a statement, I think. 

grey suiting 1950s skirt and vest pattern

1950s 1960s vest pattern grey suiting green and grey lining

The pleated skirt inset will be 8 inches high and 10 inches wide when finished, with a center box pleat and three pleats to either side of that. The top will be trimmed with a fairly narrow band, pointed at both ends and finished with a decorative button at either end. I'm toying with the idea of making covered buttons for the vest and skirt inset, but haven't decided yet. I love the look of covered buttons, very clean and tailored, but I'm not sure if I want to go that route or use something that will contrast (very slightly) with the fabric. I'll have to see how I feel when I get to that stage. 

        Happy sewing!


Sunday, April 7, 2013

Foray into the Forties

I've got a couple of WIPs that I've been working on the last few weeks, and wanted to share them with you, just to prove I've actually been sewing. The first is a modified version of Butterick 5152 (the 1948 robe pattern). This was essentially a wearable muslin, as I've never used the pattern before and the fabric was some quilting cotton I used as part of a stash busting effort. I've shortened it and added a waistband that will button in order to make it into more of a house dress. Sorry the second picture is a bit fuzzy. The camera and lighting in my house this morning weren't cooperating as I would have liked. 


Overall this pattern went together pretty easily. I cut a size larger than I usually would, so that it will be comfortable for immediately post-baby. The only issue that I ran into with the pattern was the blousing effect on the bodice back. The top is intended to blouse, as was the style in the 40s (particularly in a robe), but the blousing at the back of this was a bit extreme. I am a bit swayback as well, which may have something to do with it. I had a friend (also swayback) come over and try it on before I did any alterations since fitting on myself is a little challenging right now. I ended up taking about 2 inches of length out of the bodice back in order to get a smoother line. I have yet to hem it or make buttonholes in the waist, since I want to wait and do that once I'm not a complete watermelon anymore and can check it on myself. 

The second project I've been working on is a 1940s shirtdress. As I've said before, I'm making an effort to make myself some nursing friendly dresses to wear, and so shirtdress, and other patterns I can easily adjust to open in the front are on the docket now. This one was also a stash buster; another quilting cotton that's been sitting around for a few years. The pattern I'm using is Simplicity 4729 from 1943. I'm making View 1, but without the ruffle trim, and will most likely only use two buttons (as in View 2). 


I've got the bodice and skirt assembled, and just have to attach the sleeves, hem the skirt and finish the fastenings. I really like how it's coming together so far, and I may well use this pattern again in the future. 


I really liked this "coffee bean" print, but I do wish the fabric were a bit less stiff. I think the skirt would hang a little better. Again, as more or less a wearable muslin, I'm pretty happy with it. 

I'm still debating what to do with that rayon print I posted last time, but in the meantime I have another button front dress pattern in the queue. Once I get this shirtdress finished up I will be starting on this 1930s pattern: Simplicity 2636 from 1938. I have this lovely, pale lavender, cotton lawn that I plan on using for it. It will be nice and light for summer, but will obviously require a slip at all times. I've actually got a 1960s slip in my "collection" with a broken strap that I never wear. I never wanted to get rid of it because I got it for free, it's exactly my size, and the lace is pretty, but I haven't bothered to fix it either. I realized the other day that I could actually make it into a nursing slip when I do fix the straps, since it needs to be done anyway. I can just as easily use snaps or hooks to make it more utilitarian. 


I'm going to be making View 1 (without the sash) since the tiny buttons on the front bodice are actually functional. I was a little surprised by this, but was glad to discover this since it means I don't have to alter the pattern to add functional front buttons. I'm going to need to find/make a narrow purple or green belt to go with it, but once can never have too many different colors of belts anyway. 

Hope everyone else is enjoying their weekend!

Thursday, April 4, 2013

Decisions, decisions.


I have a question for all of you. I have 4.5 yard of this lovely floral print challis (it's 54" wide) and am having a devil of a time figuring out exactly what I want to do with it. I bought it knowing I wanted to do something late 30s-early 40s, with gathering details and so forth, but am limited not only by my pattern stash when it comes to this sort of thing, but also by the fact that I need it to unbutton in front (needs to be relatively nursing friendly).
I have a couple of patterns that may be in the running, but am not sure that fabric-wise they will be the best choice, as this challis doesn't have a whole lot of body. I can fix that to a certain extent with interfacing, but would like some other opinions.

Here's the fabric....

And here are the two patterns I'm toying with at the moment...

Marian Martin 9241

And Anne Adams 4811...

I'm totally comfortable with combining components of patterns, or drafting new pieces (although I would rather not take the time right now), but I'm having a really hard time deciding A. if either of these will work, or B. if this is really the style I want to go for at all. These are very different from most of what I have in my closet now (although I am a fan of this era), but most of what I have is also not nursing friendly and I'd love to have something practical but cute.

Any opinions on these two patterns, or suggestions of other patterns to look at would be much appreciated!

Thanks,

Friday, March 15, 2013

Just a quick couch update

So, if you've seen any of my last few posts, you know good and well that I've been SERIOUSLY procrastinating about finishing the refurb work on our couch. Well, it's still not 100% finished (there are a couple of touch up things needed on back and bottom) I'm just about there. I put together the three bottom cushion covers last night, so the big cushions are all finished now. And let me tell you, wrangling those suckers was no easy feat. I was thoroughly worn out by the time I got them all on. They are made of some dense, and very heavy foam! Sorry for the blurry laptop photo, but I didn't feel like hauling out the big camera and taking pictures.


There are also two small cushions that sit at either arm of the couch. One of those is finished, and I was working on the other last night, but accidentally let the zipper pull slide off and have had a devil of a time getting it back on since the cotton tape is beginning to fray. I will most likely end up going to get a new zipper, which means that final cushion will have to wait a bit, but at this point the couch is finally a uniform fabric and is totally usable. I didn't take a before photo, because the couch really was just too horrendous to inflict on the public. We brought it from Mr. S's apartment, and suffice it to say, it was a hand me down couch that had been owned and destroyed "loved" by a bachelor and his various roommates for the last 12 years. It also looked like a dog had maybe tried digging for a few too many chew toys at some point. Anyway, it was filthy and faded and completely torn up, and his roommates were shocked that I let him keep it. This couch is, however, a really great piece of furniture, despite the terrible abuses it appeared to have suffered over the last decade or so. First and foremost, it's giant! When you remove the back cushions it's almost the size of a twin bed (a fact for which my uncomfortable, pregnant insomniac self has been very grateful lately). On top of that, in spite of all the headache and backache that recovering this couch has been, I only spent about $260 to refurb it, compared to the much higher costs of having someone professionally reupholster it or buying a new couch. Plus now that I'm just about finished with this I don't have to feel guilty for working on fun projects for myself, and that is always nice.

On a side note, I just got a copy of A Stitch in Time Volume 2 and Vintage Gifts to Knit in the mail a couple of days ago. I'm very impressed with the first one in particular. It has both the original and that updated versions of the patterns, as well as lots of information about vintage fit and popular techniques used in the patterns, something I find really interesting. I'm very excited about several of the sweaters and things in these two books and once I work through the two sweaters and the baby outfit I have in my knitting docket I hope to set to work on some of these.

Image source
Image source
And finally, on a completely unrelated note, while searching through my pattern stash yesterday afternoon, I discovered to my own disappointment and shame that I do not have a single (30s-40s specifically) housedress/housecoat pattern! I really want to make myself a 1940s housedress to throw on while I'm sitting at home, or to run to the grocery, etc, and I'm going to have to improvise it seems. It also needs to be something that's relatively nursing friendly. I have a couple of dress patterns and Butterick 5152 that I think I'm going to play around with to make something workable.

Image Source

I think I'm going to use this as a base (short sleeved version), shorten it to knee length, omit the sash in favor of a double button closure at the waist, and add a pocket on the right hip. We'll see what ends up actually happening. 

Have a good weekend, all!


Related Posts Plugin for WordPress, Blogger...