Sunday, December 14, 2014

Seasonal sewing: My minoru

This post should really be back dated like 6 weeks or more, but whaddaya gonna do...

I'm not always the best at sewing in preparation for upcoming seasons. I know this is something that many of us struggle with, much preferring projects that we'll be able to wear immediately. That's not always the most practical, though, especially when it comes to cold weather sewing I think. For once, though, I've actually managed to get something finished in preparation for the cooling weather so I actually have it ready to wear when I need it.

In this first phase of my great coat replacement efforts, I've made myself a Minoru. I made this one to replace a quilted nylon jacket that I inherited from a friend ages ago (a thrift store find originally). It was my go-to winter jacket for walking, sledding, etc, and it was grungy, worn, had splitting seams right and left, and all in all was in desperate need of retirement. Since this Minoru was intended for walking, cycling and trips to the park, I needed something water-resistant. I found a tomato red, treated cotton jacketing at Denver Fabrics for about $5 a yard that was perfect, and nearly the same color as the jacket I was replacing.

Sewaholic Tomato Red Minoru


I knew I wanted a fun, printed lining ( I mean, really, what's the point of making your own clothes if you can't give yourself fabulous and entertaining linings?), but opted for a solid rayon bemberg for the sleeves for ease of wear. While lurking around the Denver Fabrics site, I happened upon this AMAZING, printed cotton twill. At around $5 a yard as well (and covered in vintage ski posters) I was going to have to have it anyway, but could there really be a more perfect lining for a jacket like this? I think not. I was going to need a lot more warmth for my purposes, so I interlined the whole jacket with cotton batting, quilting the twill for the body before cutting.

Ski poster lining

cotton twill and rayon bemberg lining


I cut an 8:6:4 to get the right proportions for my figure, and I also added in-seam pockets at the sides about an inch down from the waist elastic. I'm very glad I did. A jacket without pockets on the outside just doesn't compute in my world. I also had to get a longer zip for the hood (as many people have noted), since the opening is too long for the listed 18 inch zip. I shortened the waist elastic to about 8 inches also, to get a little more snug fit at the waist. I'm really happy with the fit. I could maybe have given myself a little more room in the shoulders since it does get a tad snug when I've got a few layers on, but in less than freezing weather it's perfectly comfortable and functional. I've tested this thing driving, walking, and cycling and it's great for all three. It's long enough to keep my rear warm on the bike seat, keeps the rain off well, and the inside pockets (on which I omitted the velcro) are the perfect size for my phone, house key and some cash for quick trips with the munchkin.

Side view minoru from sewaholic

In seam pockets minoru jacket


Cotton twill vintage ski poster print quilted lining

Minoru jacket open collar front view


I've been trying to get pictures taken of this thing for two months, and today I finally got a break from the frigid weather and rain to get some pictures in the slightly better light on our side porch, so of course then the camera battery died on me in the middle of it. Hours later, I finally have pictures of this thing, inside and out. It's already been worn A LOT. Like, basically every day. it's been awesome for the gross, fairly wet weather we've been having. It's comfortable and looks a whole lot nicer than it's predecessor. I can fit a couple of layers under it comfortably as well, which makes it nice and toasty even on the days it's been about 18º outside.

There are a couple of little tweaks I'll make if/when I make another of these; enclosing the hood seam more effectively, being a little more careful about my topstitching around the base of the collar, etc, but all in all I think it's safe to say that I LOVE THIS COAT.

Friday, October 10, 2014

A pair of Hawthorns

I finally made a Hawthorn! Well, okay, I finally made two Hawthorns, and I made them a couple of months ago, but still. I made a Hawthorn!

I'm totally late to the Hawthorn party, but I'm so glad I've finally joined. This is seriously one of my favorite new patterns. I rarely make any pattern twice, and having now made the 3/4 sleeve dress and the blouse version, I have plans for more of each.

First up is the blouse version. I made this in a white, swiss dot that I got from Michael Levine, and I couldn't be happier with the fabric for this top. I was clearly inspired by the sample in white with black polka dots. Must have polka dots! The swiss dot was subtler, though, and will therefore be more versatile when it comes to pairing it with things in my existing wardrobe. For the blouse I cut a straight 6, and didn't really have to make any changes, other than raising the waistline seam about half in inch in center front and center back. I frequently have trouble with RTW blouses pulling at the bust, but since Hawthorn is drafted for a C cup already I didn't have to make any changes. This fabric does wrinkle as soon as you look at it, which can get a bit annoying, but It's less noticeable on than when it's on Tabitha. I swear I ironed it, really.


Hawthorn #2 is the 3/4 sleeve dress version. I used a chartreuse Italian shirting (also from Michael Levine), and as this fabric had a lot more stretch to it than I was anticipating I cut a 6:4:6 to make sure that I had a snug enough fit at the waist. The only other changes I made were the same shortening of the waistline at center fronts and backs because for some reason it was dipping quite a bit on both versions, and I also added in-seam pockets. Now, let me just say, I LOVE this fabric in that the color and pin striping are amazing and it feels really good on, but Oh. My. Lord was it a pain to sew. The amount of stretch in this stuff made stripe matching an absolute nightmare, so I eventually gave up on it for the most part. It also made  stitching the sleeve plackets a total bear. As a result, they are far from impeccable, and I really would like to make another one (maybe a long sleeved blouse) to try and get the plackets really perfect. I ended up facing the hem in order to keep a little bit of length, and I think next time I'll just cut the skirt an inch or two longer, since I like my skirts a tad longer than the pattern calls for. It also makes sitting on the floor with toddlers a little more ladylike. All in all, I love this dress, and I've already worn this one a few times too. The boy and I had just gotten back from a bike ride to playgroup, hence the rolled sleeves and rosy cheeks, and this dress is totally bike friendly as well. The bike that I have the baby seat on doesn't have fenders or skirt guards, but a simple dress clip fixes any skirt catching issues, and the skirt is long enough that I don't feel like I'm flashing everyone even when it rides up a tad. I have a million other things in the queue, but I would kind of like to make another of these for the fall now that the weather really is finally cooling down.

(The lighting in our house is terrible, but it hasn't been much better for photos outside lately, so I apologize for the glare through the side door. And boy do I need a haircut.)


Happy sewing everyone!

Saturday, October 4, 2014

Irish lace

In what little time I have to sew and knit lately, I've managed to grab a few moments here and there to  work on a new sort of project for me. A couple of years ago a good friend gifted me with a pretty massive stack of vintage and antique crochet and knitting books, ranging in age from about 1915 to the 1950s. The vast majority of them are crocheted lace patterns (plus one KILLER 1930s knitting book, which I've got plans for later this winter), and while I've never been much of a crocheter, some of these lace patterns are just too pretty for me not to try my hand at it. 

I decided to try and stick with something fairly simple for my first go 'round, so I picked this fabulous Irish lace jabot pattern. There is no dat on the pattern, but I'm guessing it's from around 1940. It has taken me MONTHS (ok, honestly I have no idea when I started this thing, but if feels like eons ago) to finish this thing. Mostly since I only had little bits of time here and there to work on it, and even then I couldn't work for very long in a sitting because it started to make my hand cramp after a while. Maybe this should tell me something about my tension? 

1940s crocheted irish lace jabot ruffle

1940s crocheted irish lace jabot ruffle

A lot of these patterns call for size 50 crochet cotton, but I had a hard enough time finding 30 anywhere. I'm seriously doubting whether 50 even still exists, but it seriously has to be about the size of hand-quilting thread because the 30 is pretty darn tiny. Anyhoo, this pattern was not only simple, but it was one of the few that called for 30 to begin with, so I guess it was kismet. After the foundation rows the jabot is worked back and forth in a "U" around the center, building outward in a series of simple 7-chain loops. The final three rows are done with an alternating 7-chain loop and double crochet shell. I was kind of winging it on the final rows, since I couldn't tell from the picture exactly what the edging was supposed to look like. In theory, this is right. Either way it looks pretty, so who cares, right? The entire piece is about 18 inches long, and gets folded in half when worn. I have no ideas what I'm actually going to wear it with since almost all of my clothes have "V" or scoop necks, but I'll figure something out. It's just too awesome not to wear. 

1940s crocheted irish lace jabot ruffle

I still need to hit it with a little bit of starch to get the ruffles to hold really well, but overall I'm really happy. I'd say for a first lace project it was a success. Has anyone else been trying their hand at something new lately? I'm always keen to learn new skills (because I clearly don't have enough projects already). Even if I only end up doing something once I can at least say that I have. 

(You've also got a little sneak peak on Tabitha of what I've got to share with you all in my next post, however belated). 

The fall weather seems to finally be here to stay in Kentucky. This weekend is supposed to be pretty chilly, and I'm loving it so far. Mr. S is off work next week so I'm hoping to get in plenty of time outdoors with my boys, plus lots of sewing time since I'll have an extra pair of hands around to help with the Tasmanian Devil who thinks he's two already. Hope everyone has a lovely weekend!


Tuesday, September 16, 2014

Digging in the dirt

Just popping in to say a quick hello and a glimpse of one of my unblogged projects from this summer.  This post also marks my own official photographic return to the blogosphere. It's really difficult to get pictures of myself unless Mr. S is home (which is not often as a small business owner), and for a while after my son was born I didn't really want to take pictures of myself anyway. But I'm back! Pictures of me may still be few and far between, but I'm going to make a concerted effort to get more photos of clothes on me and not just Tabitha. Last weekend my husband and I were doing some yard work, cleaning up the garden and planting some new shrubs, and as I already had my 1940s overalls on with the rest of my rather flamboyant gardening garb I had him snap a few quick shots (dirt, sweat and all) to show you. I used a lightweight, light blue denim, and some white ric rac from my mom's stash, along with a bit of polka dot ribbon I had lying around, just to brighten them up a bit.


These are kind of a frankenstein garment, using the bodice from a vintage playsuit pattern (I'd have to dig out my pattern index to find the number, but it's from the late 30's or very early '40s), and Simplicity 3688 with a little cuff added. The pockets were an idea I got from Bex, and stored away until I had something to use them on. The ric rac was basted on and then sandwiched between the pockets and the pocket facings, and then I topstitched the pockets to the overalls. 


I painted these wooden shoes a couple of years ago and I love them for yard work. They are so easy to slip on and off, and they're great in the mud. Plus, how can you not feel better with birds and hearts staring back at you from your bright yellow toes? I mean, really. 


I've worn these numerous times since I made them and I really love them. They're super comfy, totally utilitarian, and while I have something to wear for grubbing around in the mud I still feel like myself. I've got a couple of other projects from this summer that I'm working on getting some pictures of, and will hopefully have those posted soon so I can get on to my current projects (both sewing and knitting). Since the weather this week has finally cooled down and the brisk bite of autumn has firmly (hopefully) taken hold, I've been getting geared up for some winter wardrobe building.  I've got three major cold-weather sewing projects in the queue in an effort to revamp my winter wardrobe, but more on those later. For now, I hope that everyone is enjoying this shift into fall!

And because everything is better with 80s music video footage:


Friday, August 29, 2014

Stormy Weather

I'm back! It's been a while, and this is only one of a handful of projects that I've finished and haven't managed to get photographed, but I am so excited about this one I just had to share. Stat. I've been a little late to the party, but I'm finally getting myself caught up with some of the great indie pattern companies out there, and after making myself a couple of Colette Hawthorns last month (which I promise I'll show you soon), I've made my first foray into the Sewaholic library as well. I've got a Minoru jacket and some Renfrews planned, but first up is the Robson Trench Coat. I cannot tell you how much I love this coat. I had a traditional, beige trench I got at a consignment shop for cheap a few years back, and it was nice in the wet weather, but it was actually a few sizes too big and I just felt I was swimming in it every time I wore it. I decided to replace it as the first project in my "Great Coat Replacement Project" of 2014. Virtually all of my winter coats and jackets desperately need to be phased out. They are all vintage (mostly 70s), and I got them second-hand from a former co-worker about ten years ago. Those ten years have done some damage to these babies. They've been well loved, but it's time to move on, and into some new coats that actually FIT me, and aren't coming apart at the seams or shedding like a malamute in Georgia. I figured that this would be a good one to start with, as it will be a nice transition piece for the (hopefully) upcoming fall weather. Lately we've been living it was feels like a sub-tropical zone, with almost constant downpours and humidity running upwards of 70% most days. All this rain has been the perfect backdrop for working on my new trench the last few nights.

While this coat has served more or less as a wearable muslin, I'm in love. There are a few things I'll do differently (like adding a lining, changing seam finishes slightly, etc) next time around, because there is DEFINITELY going to be a next time, but I think this puppy is going to get plenty of wear.

Sewaholic Robson Trench Coat


The fabric is used is an ice blue, water resistant, cotton twill. The color doesn't really translate well in photos, but it is a much bluer color than it appears here. Being cotton, it'll wrinkle, but I got a great deal on it, and I'm ok with needing to hit it with a steam iron every now and then. The buttons are some from the giant stash of buttons my mom has. I wanted a slightly larger button than the 3/4 inch that the pattern calls for. Because Tasia's patterns are drafted for a pear shape (which I am not), I had to do a little bit of grading between sizes. I cut a 10 at the shoulders/bust, and graded down to a 6 at the waist and hips. I'm really happy with the fit, but I think I could even stand to cut it at an 8:4:6 ratio for a bit more tailored fit. I might shift the pockets up about an inch as well, since they are just a hair lower than would be really comfortable on me. I opted for double rows of top-stitching on the seams to keep the seam allowances in place, and I like the more symmetrical look.


I used a sage green cotton to bind the seam allowances, and while I love the color combination, it shows through the pale fabric just a bit more than I anticipated. 

(I just noticed that there is still a little bit of marking chalk at the buttons that I need to iron off.)


The pattern goes together really easily and fairly quickly, despite only having little bits of time here and there to work on it. Her instructions are clear, and well illustrated, and would be very accessible for the new sewer, while the style is complex enough to be fun for the more experienced sewer as well. I'm really looking forward to trying out Minoru. That is the second project in line for the "Great Coat Replacement", and I have a tomato red cotton jacketing, with a vintage ski poster print for the lining. I'm really looking forward to taking this trench for a spin when the weather starts to cool down. 


Friday, July 11, 2014

Playsuit Sew-Along Part 3

I'm a few days behind on the final playsuit posts because I ran into a few technical issues (first my iron died and then my skirt was too small and had to be fixed), but I finally have all four pieces finished and photographed. I've shown you all the patterns before, so I won't go into much of that today; it's pretty much be a photo post, but I will explain a little about this skirt. The pattern illustration indicates that this is a fairly full, A-line garment. Let me tell ya. It's not. At all. The skirt actually turned out looking a whole lot more 70s than 40s. It's a super narrow A-line, and that plus the mid-calf length really make me feel like I need to part my hair in the center, go braless, and carry a macrame bag. That being said, I do still like the skirt, it's just not quite what I had originally planned on. The other issue, was that despite all the pattern measurements and everything checking out, the skirt was entirely too snug, causing pulling at the pockets and the button placket over my stomach, not to mention the lack of room in the waist. Not appropriate for pizza feasts, this one. I had already done a lot of the finishing and really wasn't looking forward to taking everything apart and recutting the waistband, etc, so what I ended up doing was adding a placket extension to the underlap in order to give myself some room to shift the buttons over. That made a huge difference. I also had to shift the buttonhole placement quite a bit so that I wasn't getting the gapping across my stomach that was happening with the original placement. Despite the issues, I'm pretty happy with the end result, and it will work well with all of my solid t-shirts/camisoles and sweaters as well. So here it is, followed by the other three pieces.


Hope everyone is having a good summer!

-Evie

Monday, June 16, 2014

Playsuit Sew-Along Part 2

I've now finished the next two pieces of the planned four for my playsuit. The shorts and blouse were from two more patterns in my vintage pattern stash. The shorts pattern is from the playsuit pattern that I mentioned before, Advance 2407, which I still need to get a better picture of. I can't find one anywhere on the internet for it, so you'll just have to be patient. I made the shorts as a separate piece, eliminating the blouse portion of the playsuit and opting for a simpler, later style of blouse from the other pattern, New York 1292. I don't really have much to say about these two pieces, as they are fairly simple and went together quickly and easily, so without further ado, here are the photos of the finished shorts, blouse and halter from the previous post all together. 

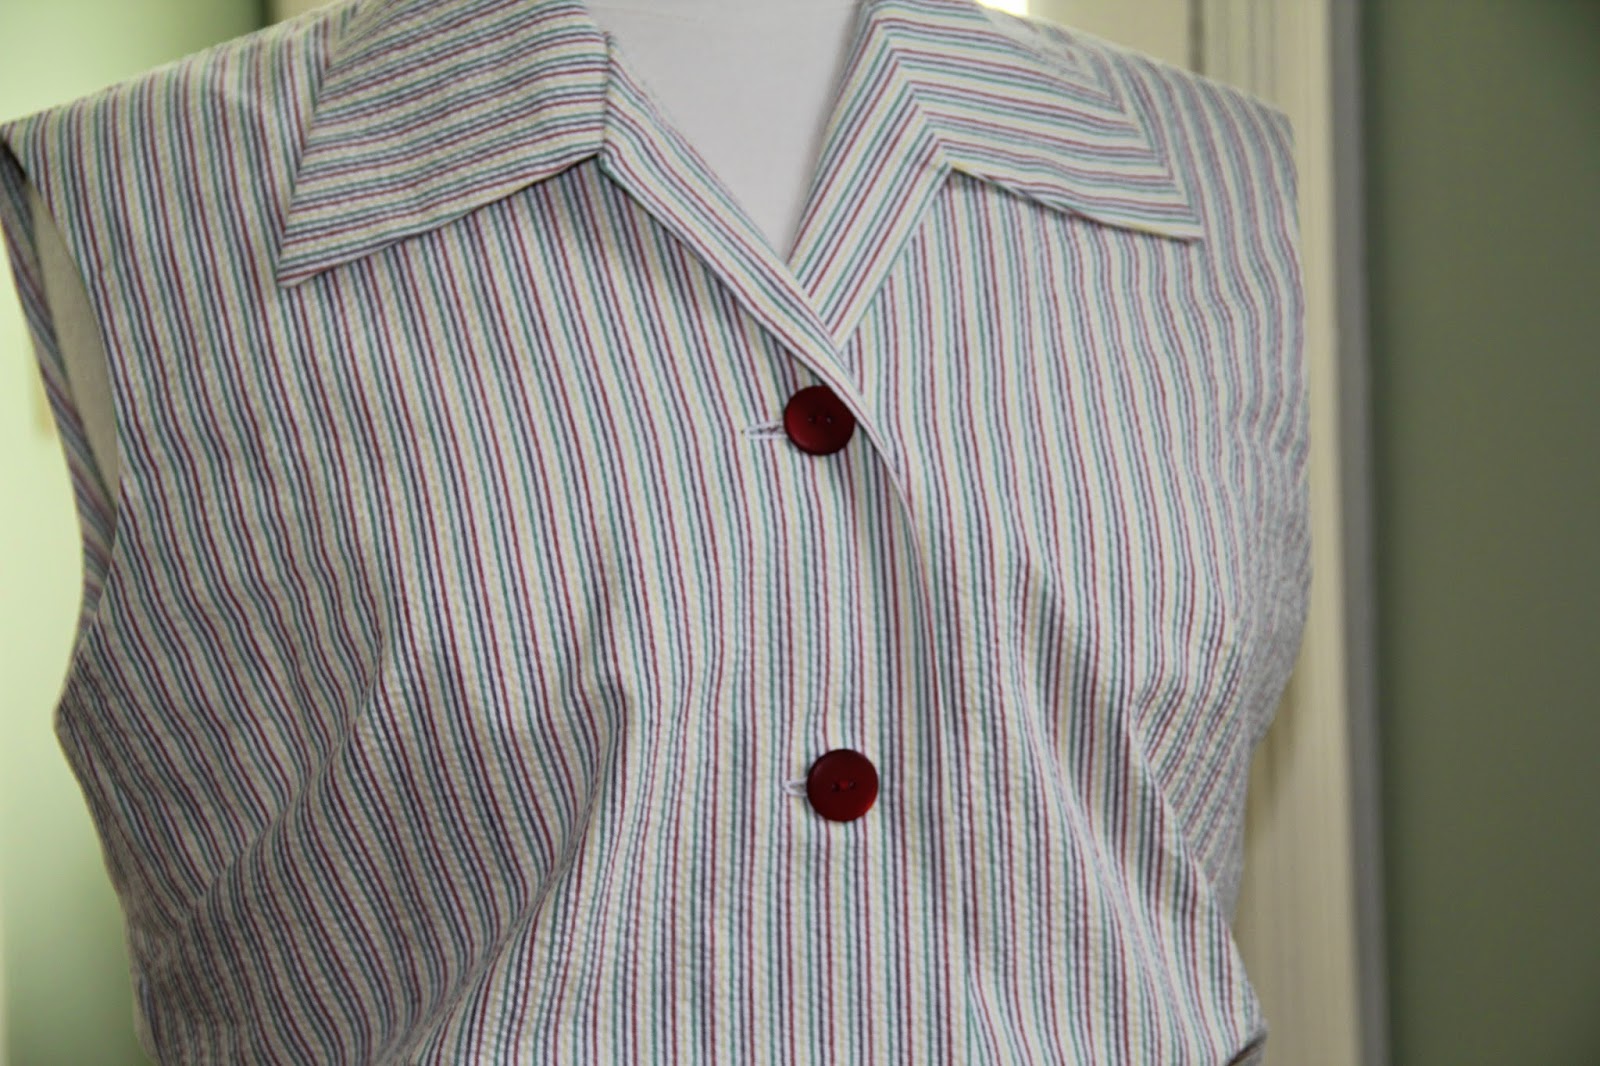
1940s seersucker stripe playsuit playsuit sew-along


And here is the halter top with the shorts...


The fourth and final piece I'll be making is a coordinating skirt in a solid; something that will be very easy to incorporate into my existing wardrobe. The fabric I'm using is a purplish-navy linen/rayon blend that matches very nicely with the blue stripe in the seersucker. I'll be using New York 1292 for the skirt as well, but I'm not going to add the triangular appliquéd pieces on the sides as I do want to maintain a simpler, cleaner line. Originally I was thinking of using a 1970s skirt pattern that I have. It's very similar in style, A-line and with buttons down the front, but it's a slimmer skirt, and I think that this slightly fuller A-line will work better with the other playsuit pieces. 


And just for good measure, here's my little helper. He just turned one a few weeks ago. I can't believe how big he's getting! (He hates when I try and wipe his face, which is why it's covered in blueberry oatmeal). 


Have a great week!

Friday, June 6, 2014

Playsuit Sew-Along Part 1

When Stephanie announced that she was going to be hosting a playsuit sew-along a few weeks ago, I knew that I wanted to participate. I had a little time before the sew-along started, and I already have fabric and a pattern in my queue for one for this summer anyway. It was just meant to be. My plan has morphed a little since my original design idea. At first I intended to make a pattern I've used before, one from right around 1940, and just sew it up without alterations. Once I got to thinking more about it and looking through everyone's inspiration pictures I decided to do something a little different. I'm using the shorts portion of the original (pleated shorts with a button fly), but have opted instead to make a halter top, sleeveless blouse and coordinating overskirt. I've got the shorts and blouse cut out, the skirt fabric is in the wash this very moment, and the halter/crop top is nearly finished. I just need to add the buttons and buttonholes at the back and finish stitching down the lining at the center front. The fabric for the halter, shorts and blouse is a lovely striped seersucker I bought a couple of years ago. I'll have more information about my patterns for the other portions of the playsuit in upcoming posts, but for now I'll just tell you about the halter quickly. 

I used the beach bustier pattern from Mrs. Depew Vintage, one I had fallen in love with after seeing Tasha's version. I made the size small (34 inch bust), and I'm pretty happy with the fit without making any alterations. My actual measurement is 35, and I wear a C cup and the fit is almost perfect. Generally patterns like this tend to fit best on smaller cup sizes, but having read Tasha's review I figured this one would be just about right. This pattern would be great for anyone with a smaller band size and larger cup, probably best fitting a C or D cup, something that's fairly hard to find with vintage patterns in my experience. I interfaced the front of the lining pieces to give the top a little more structure because I wanted to be comfortable wearing it without a bra. I also added boning just at the center front, which I attached to the lining, in order to help keep the front sitting straight when worn. 


I should have set the straps in at an angle, but wasn't really thinking, and I'm actually considering making them convertible, so I can wear it either as a halter or cross-back. I'd use small buttons inside the back band and buttonholes in the ends of the ties. They sit flat in front if the straps are arranged that way, and it doesn't show quite so much when it's on me and not the mannequin. I'm really looking forward to getting the other pieces finished and having so many new separates to mix and match with the rest of my wardrobe!

Monday, June 2, 2014

I might have a new favorite.

I know I promised pictures of the big, edwardian project I've been working on, but haven't had a chance to finish some of the details yet, and my corset is on loan to my mother so she can use it as a guide for putting hers together. I did take a few pictures of the (VERY wrinkled) petticoat, blouse and skirt just so you can get a quick peak at the ensemble. Hopefully I'll have that all finished up soon. 

In the meantime, however, I made myself a new everyday dress. It's from a mail order pattern I've had in my collection for a while. I don't have an exact date on the pattern, but it looks like a very early 40s design. It's Anne Adams 4811. I wanted to make something a little different than most of what I have in my current wardrobe, and this softer styled shirtdress was just what I was looking for. The rayon challis print that I used for it makes for an incredibly light, comfortable summer dress. 


I interfaced the collar and front facings to keep the edges nice and crisp and support the buttons/buttonholes in this fairly limp-bodied fabric, and the drape and feel of the whole dress is wonderful. I ended up needing to grade all the seams in at the waist, as well as grading them in slightly over the bust and through the shoulders. The pattern as is was surprisingly rectangular, despite the very shapely envelope illustration. I'm very happy with the final fit of the dress. The only other real change I made was to shift the bust gathers up about 1.5 inches (as some of you may have seen in my query on Sew Retro). The original position of the gathers was ridiculously and unflatteringly low, even if it had been an earlier 1930s, droopy chested dress. Moving them up made a HUGE difference to the overall look of the dress. I actually wasn't sure how much I was going to like it once I started assembling the pieces, but now that it's finished I honestly think it might be my new favorite dress. I kind of want to make three more. 


This dress will definitely be getting a lot of wear this summer and into the fall. It's nice to have something with a slightly different silhouette than most of my other clothes, and the colors make me really happy. I've got enough of the fabric left for another project, and I think I may whip up some sort of 1930s style Hooverette, or maybe another version of my other favorite dresses:


I'll leave you with a couple of pictures of my edwardian ensemble (Please excuse the wrinkles. They were in a bag forever while waiting to be finished and ironing all that fabric just wasn't in the cards yesterday, especially since I was putting all of it right back in a bag.) 


Hope everyone is having a good start to the week!
Related Posts Plugin for WordPress, Blogger...