Monday, June 16, 2014

Playsuit Sew-Along Part 2

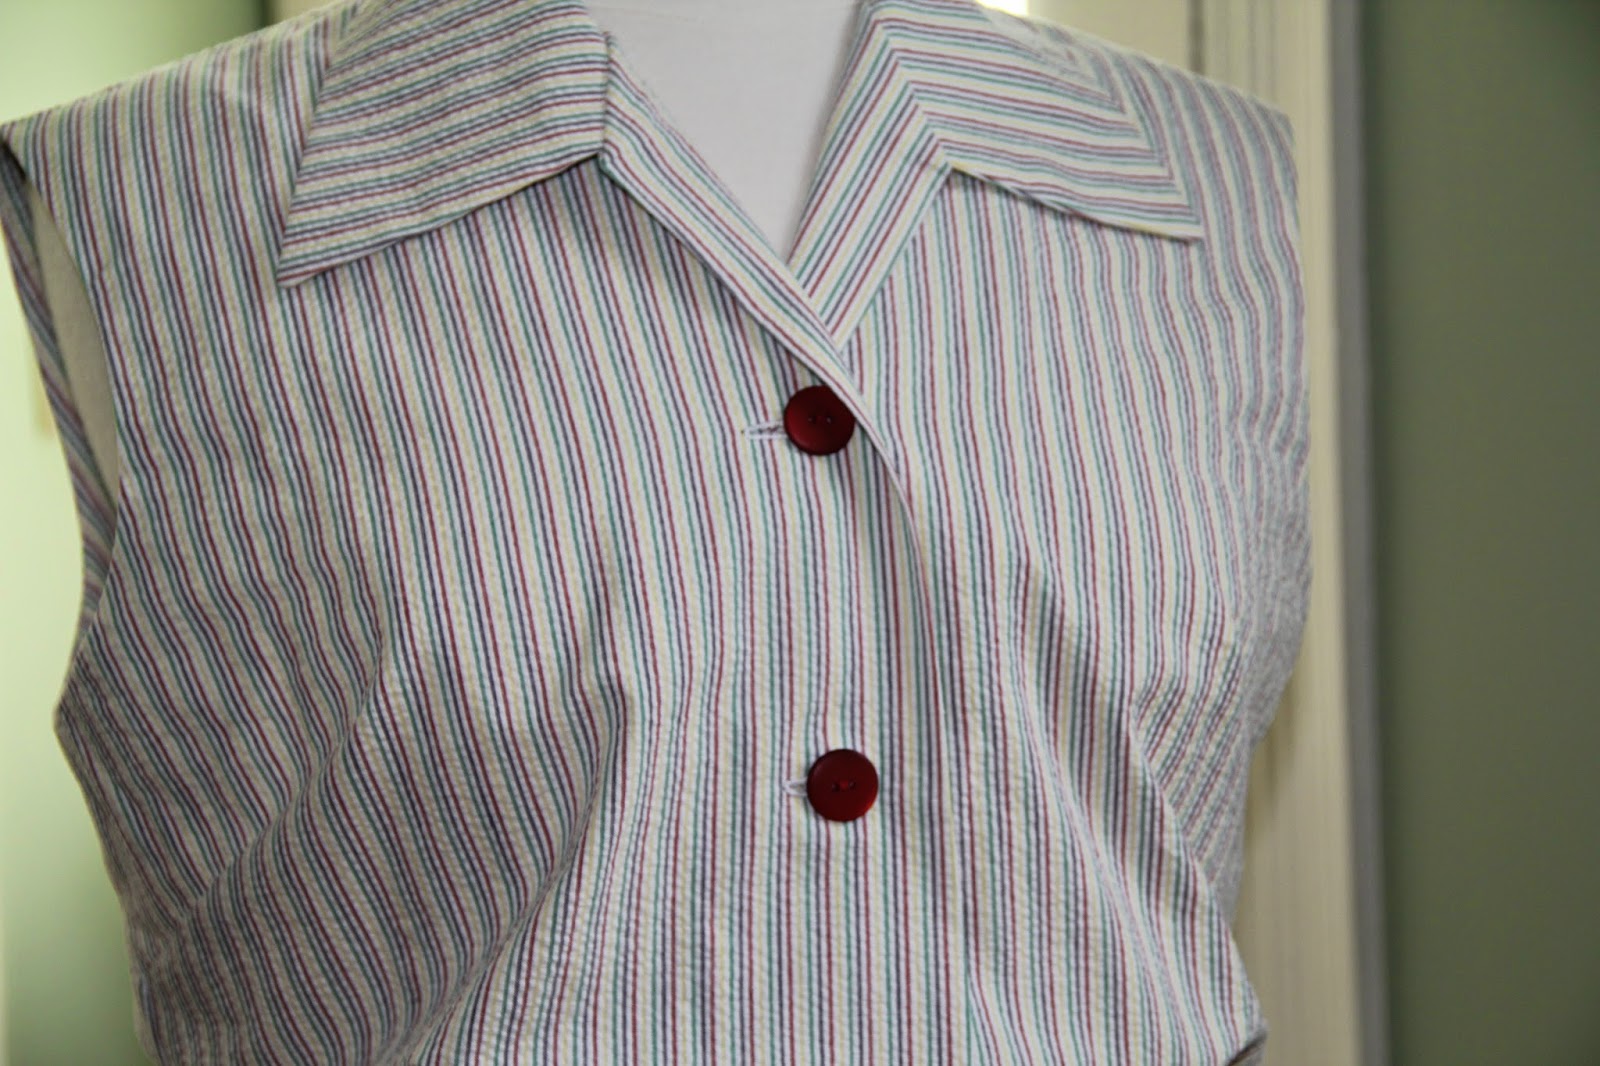
I've now finished the next two pieces of the planned four for my playsuit. The shorts and blouse were from two more patterns in my vintage pattern stash. The shorts pattern is from the playsuit pattern that I mentioned before, Advance 2407, which I still need to get a better picture of. I can't find one anywhere on the internet for it, so you'll just have to be patient. I made the shorts as a separate piece, eliminating the blouse portion of the playsuit and opting for a simpler, later style of blouse from the other pattern, New York 1292. I don't really have much to say about these two pieces, as they are fairly simple and went together quickly and easily, so without further ado, here are the photos of the finished shorts, blouse and halter from the previous post all together. 

1940s seersucker stripe playsuit playsuit sew-along


And here is the halter top with the shorts...


The fourth and final piece I'll be making is a coordinating skirt in a solid; something that will be very easy to incorporate into my existing wardrobe. The fabric I'm using is a purplish-navy linen/rayon blend that matches very nicely with the blue stripe in the seersucker. I'll be using New York 1292 for the skirt as well, but I'm not going to add the triangular appliquéd pieces on the sides as I do want to maintain a simpler, cleaner line. Originally I was thinking of using a 1970s skirt pattern that I have. It's very similar in style, A-line and with buttons down the front, but it's a slimmer skirt, and I think that this slightly fuller A-line will work better with the other playsuit pieces. 


And just for good measure, here's my little helper. He just turned one a few weeks ago. I can't believe how big he's getting! (He hates when I try and wipe his face, which is why it's covered in blueberry oatmeal). 


Have a great week!

Friday, June 6, 2014

Playsuit Sew-Along Part 1

When Stephanie announced that she was going to be hosting a playsuit sew-along a few weeks ago, I knew that I wanted to participate. I had a little time before the sew-along started, and I already have fabric and a pattern in my queue for one for this summer anyway. It was just meant to be. My plan has morphed a little since my original design idea. At first I intended to make a pattern I've used before, one from right around 1940, and just sew it up without alterations. Once I got to thinking more about it and looking through everyone's inspiration pictures I decided to do something a little different. I'm using the shorts portion of the original (pleated shorts with a button fly), but have opted instead to make a halter top, sleeveless blouse and coordinating overskirt. I've got the shorts and blouse cut out, the skirt fabric is in the wash this very moment, and the halter/crop top is nearly finished. I just need to add the buttons and buttonholes at the back and finish stitching down the lining at the center front. The fabric for the halter, shorts and blouse is a lovely striped seersucker I bought a couple of years ago. I'll have more information about my patterns for the other portions of the playsuit in upcoming posts, but for now I'll just tell you about the halter quickly. 

I used the beach bustier pattern from Mrs. Depew Vintage, one I had fallen in love with after seeing Tasha's version. I made the size small (34 inch bust), and I'm pretty happy with the fit without making any alterations. My actual measurement is 35, and I wear a C cup and the fit is almost perfect. Generally patterns like this tend to fit best on smaller cup sizes, but having read Tasha's review I figured this one would be just about right. This pattern would be great for anyone with a smaller band size and larger cup, probably best fitting a C or D cup, something that's fairly hard to find with vintage patterns in my experience. I interfaced the front of the lining pieces to give the top a little more structure because I wanted to be comfortable wearing it without a bra. I also added boning just at the center front, which I attached to the lining, in order to help keep the front sitting straight when worn. 


I should have set the straps in at an angle, but wasn't really thinking, and I'm actually considering making them convertible, so I can wear it either as a halter or cross-back. I'd use small buttons inside the back band and buttonholes in the ends of the ties. They sit flat in front if the straps are arranged that way, and it doesn't show quite so much when it's on me and not the mannequin. I'm really looking forward to getting the other pieces finished and having so many new separates to mix and match with the rest of my wardrobe!

Monday, June 2, 2014

I might have a new favorite.

I know I promised pictures of the big, edwardian project I've been working on, but haven't had a chance to finish some of the details yet, and my corset is on loan to my mother so she can use it as a guide for putting hers together. I did take a few pictures of the (VERY wrinkled) petticoat, blouse and skirt just so you can get a quick peak at the ensemble. Hopefully I'll have that all finished up soon. 

In the meantime, however, I made myself a new everyday dress. It's from a mail order pattern I've had in my collection for a while. I don't have an exact date on the pattern, but it looks like a very early 40s design. It's Anne Adams 4811. I wanted to make something a little different than most of what I have in my current wardrobe, and this softer styled shirtdress was just what I was looking for. The rayon challis print that I used for it makes for an incredibly light, comfortable summer dress. 


I interfaced the collar and front facings to keep the edges nice and crisp and support the buttons/buttonholes in this fairly limp-bodied fabric, and the drape and feel of the whole dress is wonderful. I ended up needing to grade all the seams in at the waist, as well as grading them in slightly over the bust and through the shoulders. The pattern as is was surprisingly rectangular, despite the very shapely envelope illustration. I'm very happy with the final fit of the dress. The only other real change I made was to shift the bust gathers up about 1.5 inches (as some of you may have seen in my query on Sew Retro). The original position of the gathers was ridiculously and unflatteringly low, even if it had been an earlier 1930s, droopy chested dress. Moving them up made a HUGE difference to the overall look of the dress. I actually wasn't sure how much I was going to like it once I started assembling the pieces, but now that it's finished I honestly think it might be my new favorite dress. I kind of want to make three more. 


This dress will definitely be getting a lot of wear this summer and into the fall. It's nice to have something with a slightly different silhouette than most of my other clothes, and the colors make me really happy. I've got enough of the fabric left for another project, and I think I may whip up some sort of 1930s style Hooverette, or maybe another version of my other favorite dresses:


I'll leave you with a couple of pictures of my edwardian ensemble (Please excuse the wrinkles. They were in a bag forever while waiting to be finished and ironing all that fabric just wasn't in the cards yesterday, especially since I was putting all of it right back in a bag.) 


Hope everyone is having a good start to the week!

Saturday, May 3, 2014

Coming up for air

It's been ages between posts again, and while I don't have a full post to show you yet I do have a little sneak peak of what I've been working on lately. I've actually had quite an extensive project (or series of projects) in the works the last couple of months, and I should have a completed project post ready in a couple of weeks. Here's a little teaser for the time being....

1901 s-curve corset from corsets and crinolines nora waugh

sleeve cuff with swiss insertion lace

edwardian hat trim

Friday, February 28, 2014

A sporty look

The second skirt in my Pendleton quartet is another plaid number. This one is fairly plain as well, with some simple alterations made to change the look up a bit. I widened the waistband and added suspenders. I've always really liked the look of the suspender skirt (whether from the 1910s or the 1950s or anywhere in between), and have intended to make myself one for a long time now. I thought it would be a nice silhouette with this plaid also, simple enough to showcase the pattern, but not so overly simplified as to be boring. This piece of wool had just a few moth holes that needed repair, so I set myself to work at re-weaving again. This is a much finer weave than the previous fabric, so it required a little more precision, but it really wasn't too bad. I have to admit, I think I'm actually getting a little hooked on it. It's just the kind of insanely meticulous work I find fun and relaxing ('cause maybe I'm a little nuts).

After pulling threads from a scrap of the plaid, I set to work reweaving the two holes in the skirt front, and then the two in the suspender pieces. 

Doing this made me feel a little bit like the woman who made Chanel's braided trim for decades (although not old, French, and incredibly skilled).

You can see the first hole mid-repair just to the right of the pin. 
The skirt turned out pretty well, and I had just enough left of the fabric to make a matching hat (because every outfit should have a matching hat, right?). Anyway, I used the Wearing History Sporty Toppers pattern, view 1. I was working with scraps, so the plaid doesn't match perfectly on top, but it doesn't bother me too much since there is so much seaming to break it up in the first place. I used a slightly narrower ribbon than called for in the pattern, but I like how it looks.


To complete my sort of "golf-course" couture look, I managed to finally finish one of my biggest UFOs; this brown wool suit jacket. I started this suit about three years ago, finished the skirt, got about half way through the jacket and then put it on the back burner and left it there to stew. It feels really good to finally have it finished and out of the project pile. It's far from perfect, but finished it all I was really aiming for at this point, so I'm happy with it. I don't have all the pattern details in front of me, but I'll try and dig them up. I'm pretty sure it's a McCall's pattern, and it's from the 50s, but I'm not sure the exact year and can't remember the number. Anyway, here's the ensemble all put together and ready for a stroll across the fairway. (Both pieces need a little touch up with the iron).


So, that's that. Now on to other projects in the queue. I've still got two of the wool skirts to put together, and then numerous other summery projects to start, but I've got an Edwardian event to go to in early May that I also have to make some stuff for, and that will probably take precedence. Hope everyone has had a good week!

-Evie

Sunday, February 9, 2014

Warding off the winter chill

As promised, I have finally taken a few photos of the other two projects I finished in the last couple of months. They've been worn and washed, and worn and washed repeatedly, so they are not quite as neat and tidy as they looked when I first completed them, but they have already been well loved in their short lives, so what does that matter? 

The first is a nightgown I made from McCall 5441, the same pattern I used for my black silk nightgown (blogged here). I cut it a tad larger to accommodate nighttime nursing sessions, and it has worked out perfectly. I wanted something longer to keep me warm at night, since it's been so cold here, and most of my other nightgowns are short, slip-like things. I do tend to get overheated though if I'm too covered up, so the sleeveless style of this nightgown was perfect (despite the fact that when one generally thinks of flannel nightgowns they include sleeves and lace). I'm so happy with how this one turned out! It's so comfy, and I've been guilty of throwing a sweater over it and wearing it around the house all day a few times when the boy and I were stuck in the house due to weather. 


The second project is a pair of 1940s pajamas that I made using two different patterns. The pajama pattern that I wanted to use is Simplicity 4528, but the copy that I have is a few sizes too big. 

Image courtesy Vintage Patterns Wiki
 I didn't have anything else similar to use, so I decided just to grade the jacket down and use the trusty  Simplicity 3688 trousers so I wouldn't have to bother altering those at all. I put in a snap placket (like the pajama pattern called for) instead of a zipper, with a button at the waist. I obviously omitted the belt and contrast revers as well. The double welt pocket is not one of my crowning achievements, but they were pajamas for myself, and I didn't feel like redoing it so I just decided not to worry about it. It was late, and I was tired when I put it in so my chances of getting it perfect were low to begin with. I do get too hot at night to actually sleep in these, but they are wonderful for wearing around the house during my couple of hands-free hours after the baby goes to sleep. I'll probably make myself another pair at some point down the road (and try to get the pocket right that time). They're really warm and cozy! 


We've had some really nasty weather the last few weeks, but I've been able to get some work done on a few fun things which has helped. Our little boy is getting so big, and he's a little more able to entertain himself now that he's mobile, which makes it easier for me to get things done (including housework and grading). At 8.5 months he he's just figured out how to walk while pushing one of our dining room chairs around on the wooden floors. It won't bee too much longer before he's walking all by himself! Next year I'll at least be able to take him out to play in all this snow we've had. 

Hope everyone is having a good week and staying warm!

-Evie

Sunday, February 2, 2014

Mason and Helen

In addition to the skirt and vest I finished (as well as two other projects I've yet to photograph because I've been wearing them constantly and they're rather wrinkly), I've made some decent progress on my two current knitting projects. I cast on for these after I finished my Victory Tam; one project for me and one for my husband. The sweater I'm making him I mentioned before, but just as a reminder the pattern is Mason, from the Rowan Vintage Knits book. It's knitted on 10.5s/11s in a bulky yarn and so it's going SUPER quickly (especially for someone used to fingering weight yarn on 2s and 3s)! The only change I will be making is that John wants a simple crew neck instead. The pattern itself is also very simple and therefore easy to work on at night when my brain is fried from spending all day with an 8 month old and trying to keep up with housework and grading. 


The project I've been working on for myself is another quick knit, also because it's done on 10.5s in a very simple pattern. The pattern is Helen, from A Stitch In Time Vol. 2. It's a beautiful little shrug/bed jacket pattern originally from the 1930s. As the pattern states, the original model was knitted in a pretty shell pink, but for my version I am using two shades of blue wool 4 ply. It was some yarn that my mom picked up years ago and never used because the colors weren't really suited to anything she was working on. There wasn't enough of either color for a single project, but combining them in a two row stripe as I've done here there is plenty for this shrug. I really how the colors are turing out. It almost looks like I'm using a variegated yarn. The contrast is very subtle, and goes perfectly with one of my other recent sewing projects (I'll be sharing that soon). I'm about half finished with this. It's about 2 yards long including the ribbed cuffs, and the scads of this two row repeat would be a tad mind numbing if I ever had more than a few minutes to work on it, but with my knitting time being so limited it's the perfect sort of pattern to work on. Hopefully I'll be able to get it finished in the next month or so. I really want to get Mason finished first though, so the mister can wear it before the weather warms up.


Here's a sneak peak of what's up in my sewing queue as well. These are the other three pieces of vintage wool (mostly Pendleton) that I mentioned in my last post. I've already cut a skirt from each (using the same pattern as the skirt in the previous post, each with some minor style alterations), and serged my edges to make assembly easier and faster. Before I can get to sewing on the plaid or the blue I've got to do some moth hole repair (I've only found two holes in the plaid but the blue is full of little pinholes). The fabric is such high quality that I simply can't bear the thought of not trying to salvage it, especially since I got it for free. I figured I can spend a little extra time on it. The camel colored wool seems to be fine, though, so that is probably the one I will put together first. I've got a long list of projects I'm trying to work through, and I really want to finish these skirts so I can allow myself to cut out the stripe for my Hawthorn!


Have a good week everyone!

-Evie
Related Posts Plugin for WordPress, Blogger...